Move To Nearest
With the help of the Move To Nearest command, the Revit user can move selected elements to adjacent surfaces. This command currently only works in 3D.
Starting The Command
In Revit:
- In a 3D view, select the elements to be moved.
- In the ribbon, navigate to the BIMrx tab >> BIMrx Core panel >> Move To Nearest command:

- If there is no active selection, you will be asked to select elements and finish the selection, then you will be presented with a dialog with options to choose the categories of detectable element surfaces along with options to define the move operation’s targe and destination base points:
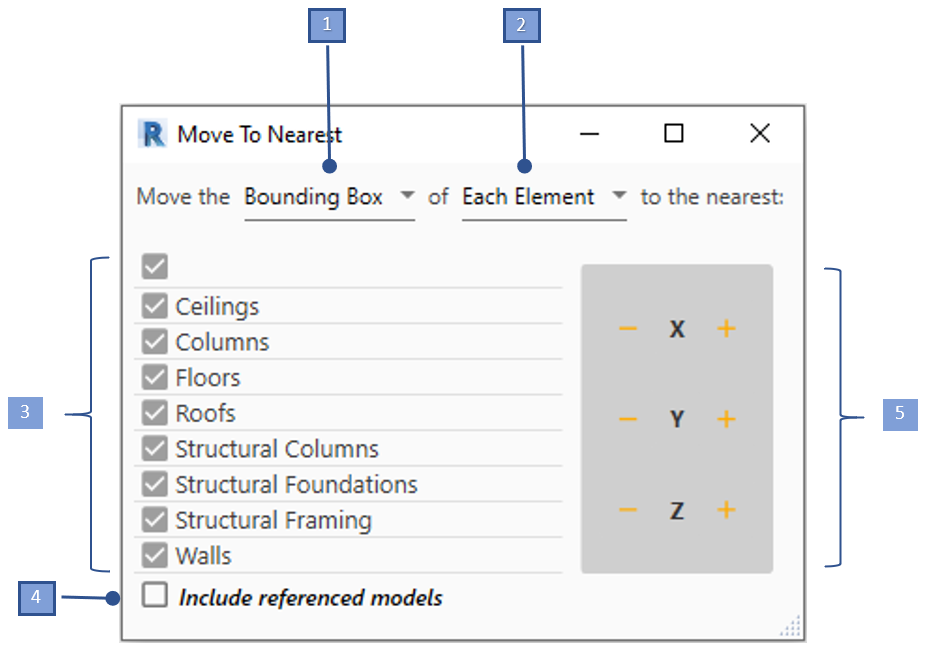
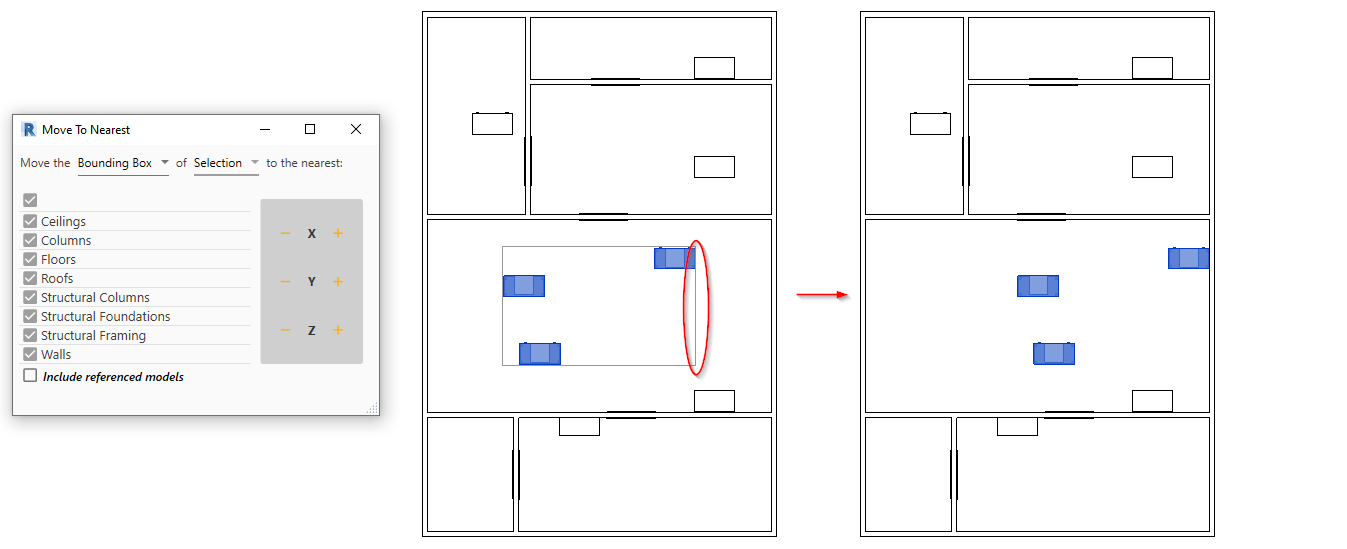
Move To Nearest interface:
- Defines the selection grab point (Bounding Box, Center, Insertion Point) for the move operation.
- Examples 1a, 1b, 1c below
- Defines the move operation to elements (Selection, Each Element).
- Example 2a below
- A list of the element categories to include in the scanning process.
- Option to include linked models in the scanning process.
- Use the Control Panel to apply the move operation in the desired orthogonal direction.
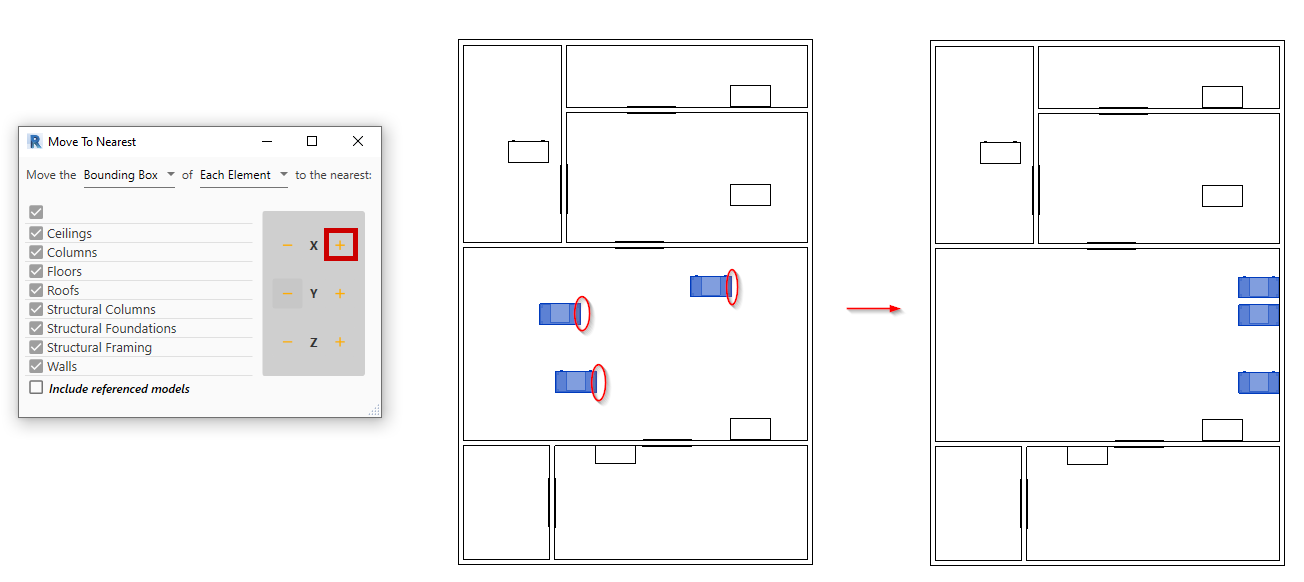
Ex 1a) Move by Bounding Box:
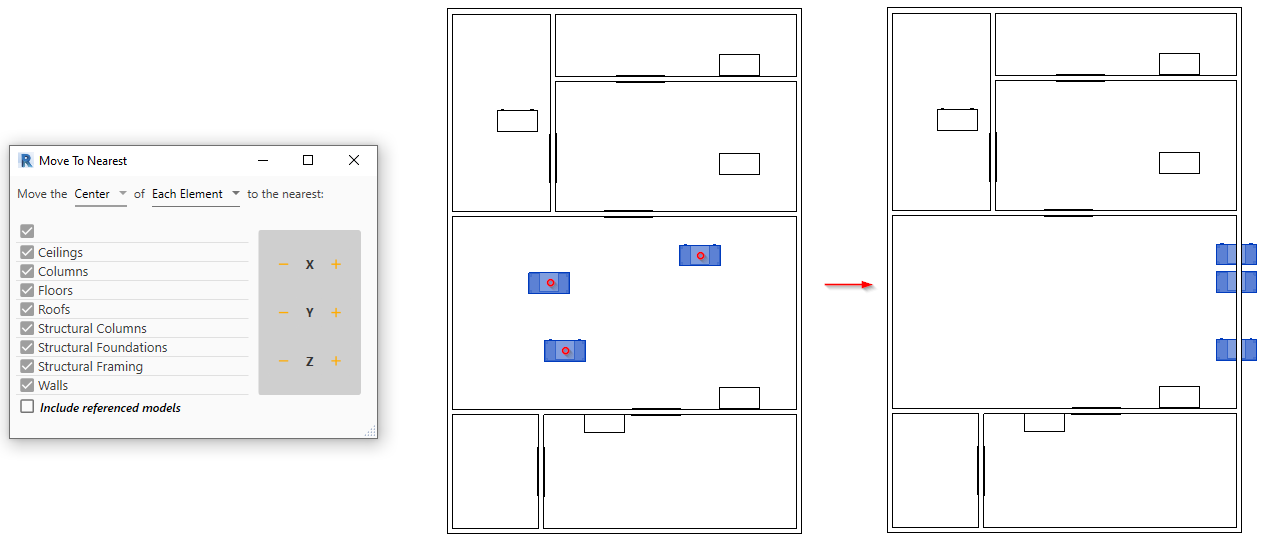
Ex 1b) Move by Center:
Ex 1c) Move by Insertion Point: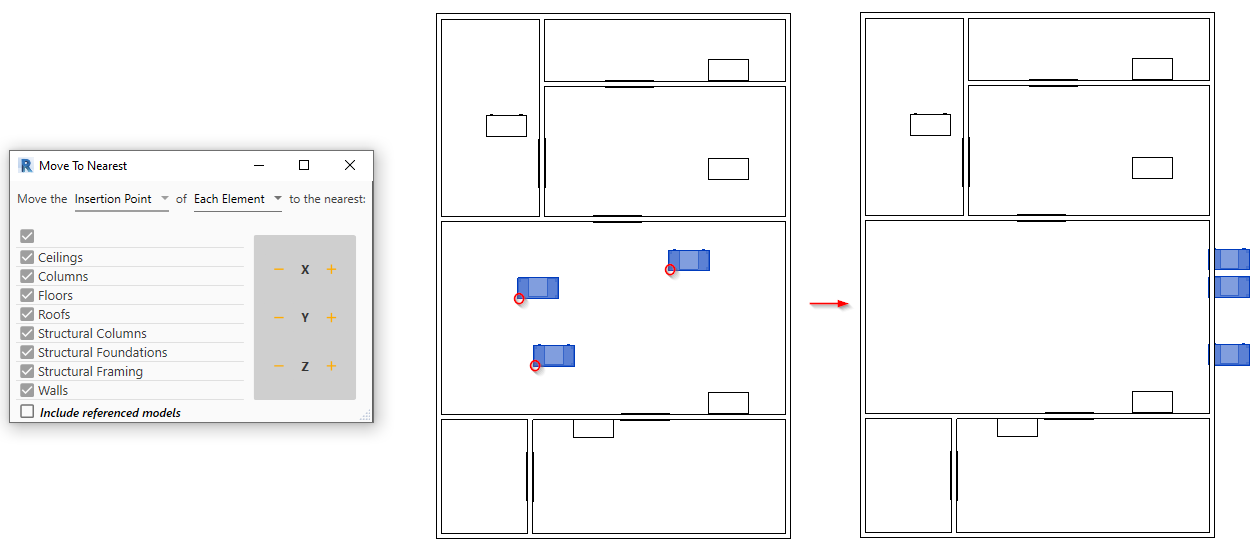
Ex 2a) Moving the Selection of elements (by the selections bounding box):
Notes:
- This feature currently only works in 3D views.
- The surface scanning will only include the elements/links visible in the view.
- In the Control Panel, clicking the move buttons consequently will apply the move operation again to the selected elements detecting the next set of clashing surfaces.
- Face hosted or level based elements may not accept the move operation in the Z direction or in a direction that separates them from the hosting face/level.