Tag Elements
In the Tag Select dialog, there are all Categories to choose from:

- Select the category of elements from the drop-down menu.
- There is an option to click the “+” button to load as many tags to the list as desired.
- There is an option to click the “-“ button to remove the selected loaded tag.
- There is an option to click the “Clear” button to remove all loaded tags.
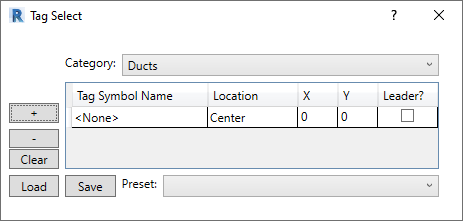
- Click the Tag Symbol Name drop-down to select a loaded tag type.
- Clicl the Location drop-down to select a location for the tag relative to the selected element.
- There are nine options including Center, Top Left, Top, Top Right, Left, Right, Bottom Left, Bottom and Bottom Right.
- Click the X and/or Y to specify an offset for the tag from the element.
- Click the Leader checkbox to toggle whether the tag should have a leader or not.
- With the Tag Select settings specified as desired, leave this dialog open and click on an element for the selected category.
- A selection window may also be used to tag multiple elements at a time.
- Modify settings on the fly to any value throughout workflow:
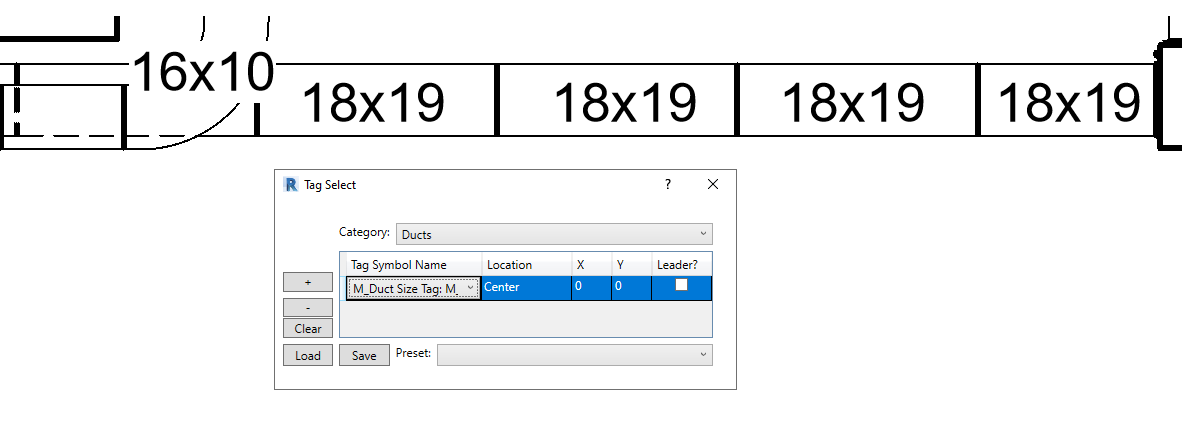
Adjust the Location, Leader, X, and/or Y settings for the desired results

For linear elements such as duct, pipe, and conduit the tags will rotate to the correct angular orientation of the selected elements.

- Close out of the Tag Select window when finished tagging elements.
Notes:
- For tags to align with the angular rotation of the element the Family must have the "Rotate with Component" property set in the Revit Family Editor.
