Select Projects
Begin by selecting the Files menu link, then refresh the “Local Projects” data list by clicking the Refresh button ![]() . Optionally set a filter to one containing projects with locatable files, as discussed in the previous section. Select a project by clicking on it and causing the project checkbox to display as checked
. Optionally set a filter to one containing projects with locatable files, as discussed in the previous section. Select a project by clicking on it and causing the project checkbox to display as checked ![]() .
.
Once one or more projects have been selected from the list, please note the “Local Files” display in the center column is updated to reflect the file/folder contents on local disk for the selected project(s).
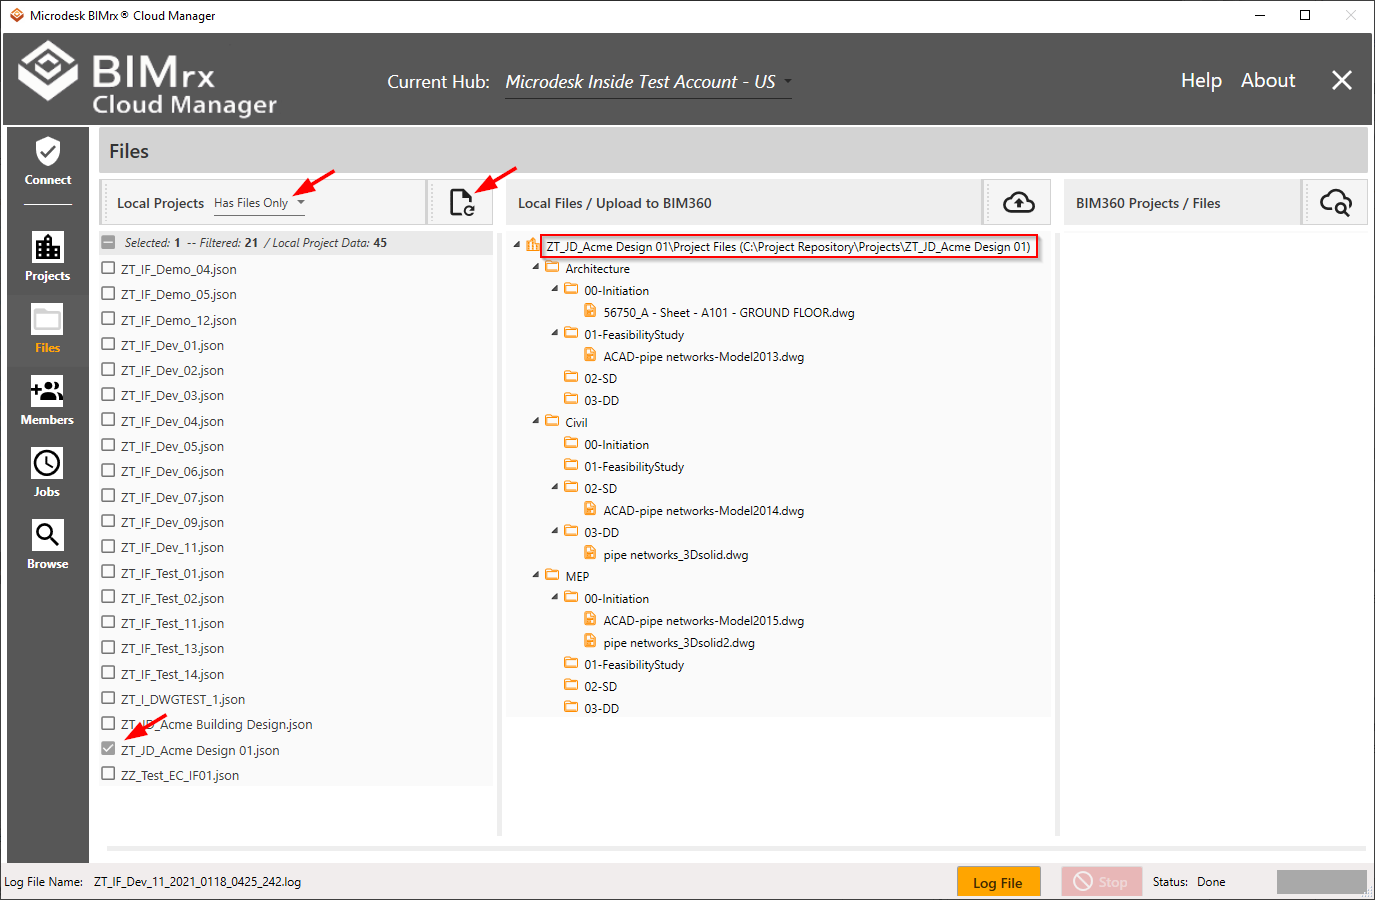
In the “Local Files” tree view the root entry for each project indicates the path to the Autodesk® BIM 360® Project folder in the cloud and the path to the project files on the local file system. From the example below,

the first part on the left indicates the Autodesk® BIM 360® cloud destination project and folder location of the files and folders that will be uploaded. In this case, the Autodesk® BIM 360® Project is “ZT_JD_Acme Design” having a folder location of “Project Files”. On the right, enclosed in parenthesis, is the local folder path location for the project files. In this case, the local folder path is “C:\Project Repository\Projects\ ZT_JD_Acme Design”.
It should be noted, the destination root path for an Autodesk® BIM 360® project in the cloud will always map to the Autodesk® BIM 360® “Project Files” folder.